
Are you new to the world of fitness and looking for an effective and convenient way to incorporate strength training into your workouts? Look no further than resistance bands. Whether you’re a complete beginner or a seasoned gym-goer, resistance bands are a versatile tool that can help you build muscle, improve flexibility, and enhance overall fitness. In this beginner’s guide, we’ll explore the benefits of using resistance bands, provide tips on proper form and technique, and offer a variety of exercises to get you started on your fitness journey. Get ready to discover how resistance bands can take your workouts to the next level!
What are resistance bands?
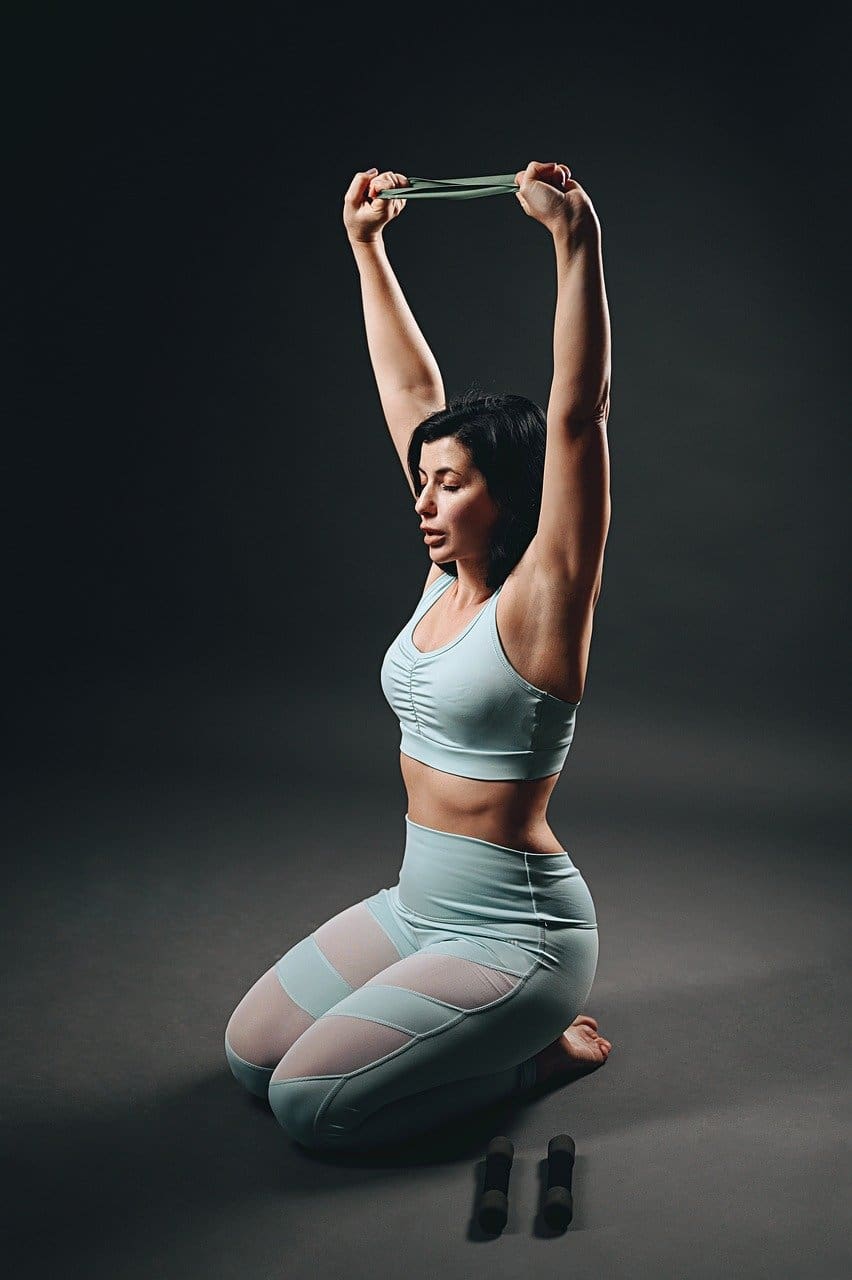
Resistance bands are versatile exercise tools that consist of stretchable bands made of either rubber or fabric. They are used to add resistance to various exercises and movements, targeting different muscle groups in the body. These bands come in different sizes, shapes, and levels of resistance, making them suitable for individuals of all fitness levels and age groups.
Definition and purpose
Resistance bands, also known as exercise bands or fitness bands, are portable and easy-to-use equipment that can be incorporated into workout routines to enhance strength, flexibility, and muscle tone. They provide resistance in both the concentric and eccentric phases of movement, making exercises more challenging and effective. By utilizing resistance bands, you can engage multiple muscle groups simultaneously, improving overall body strength and functional movements.
Types of resistance bands
There are several types of resistance bands available in the market, catering to different fitness goals and preferences. The most common types include:
-
Loop Bands: These circular bands form a continuous loop and are often used for lower body exercises like squats and glute bridges. They are available in various resistance levels, allowing you to adjust the intensity of your workout.
-
Tubing Bands: Tubing bands come with handles on each end and can be used for both upper and lower body exercises. The bands are made from elastic tubing and provide a controlled amount of resistance.
-
Flat Bands: Flat bands are long, wide bands that do not have handles. They are versatile and can be used for a wide range of exercises, including both upper and lower body movements.
-
Figure Eight Bands: These bands are in the shape of a figure eight and are primarily designed for lower body exercises. They provide resistance to the hips, glutes, and thighs.
Benefits of using resistance bands
Incorporating resistance bands into your workout routine offers numerous benefits:
-
Versatility: Resistance bands can be used for various exercises, targeting different muscle groups. They can be easily adjusted to increase or decrease resistance, making them suitable for individuals of different fitness levels.
-
Portability: Unlike traditional gym equipment, resistance bands are lightweight and portable, making them perfect for travel or exercising at home. They take up minimal space and can be easily packed in a gym bag or suitcase.
-
Joint-Friendly: Resistance bands provide a low-impact workout that puts less stress on your joints compared to lifting heavy weights. This makes them ideal for individuals with joint issues or those recovering from injuries.
-
Full Range of Motion: By using resistance bands, you can engage your muscles throughout the entire range of motion, maximizing muscle activation and promoting flexibility.
Choosing the right resistance band
When selecting a resistance band, consider the following factors:
-
Resistance Level: Resistance bands come in varying levels of resistance, ranging from light to heavy. Choose a band that challenges your muscles without compromising proper form.
-
Length and Size: The length and size of the band will depend on the exercises you plan to perform. Longer bands are more suitable for full-body movements, while shorter bands are ideal for isolated exercises.
-
Material: Resistance bands are made from different materials, such as rubber or fabric. Rubber bands provide more resistance and durability, while fabric bands are gentler on the skin and less likely to cause allergies.
-
Handles and Grips: Some resistance bands come with handles or grips, which can provide added comfort and stability during exercises that require a firm grip.
Before purchasing a resistance band, it’s helpful to read reviews and try them out in person if possible. Experimenting with different bands will help you find the one that best suits your individual needs and preferences.
Safety precautions
While resistance bands are generally safe to use, it’s essential to take certain precautions to prevent injuries and ensure a productive workout.
Checking for defects
Before starting your workout, carefully inspect the resistance band for any signs of wear, tear, or defects. Look for fraying, stretching, or weakened spots in the band. If you notice any damage, it’s best to replace the band to avoid potential accidents during exercises.
Proper warm-up
Just like any other workout, it’s crucial to warm up your muscles before using resistance bands. Perform dynamic stretches and light cardio exercises to increase blood flow, warm up the muscles, and reduce the risk of injury. This can include activities like marching in place, arm circles, or jogging lightly.
Maintaining proper form
Maintaining proper form during resistance band exercises is vital for both effectiveness and injury prevention. Always follow the correct technique and range of motion for each exercise. Engage your core, keep your back straight, and avoid jerky or abrupt movements. If you’re unsure about proper form, consider working with a qualified fitness professional or seek guidance from reputable online sources.
Avoiding overstretching
While resistance bands provide resistance, it’s essential not to overstretch them. Overstretching the band beyond its intended capacity can lead to it snapping back and potentially causing injury. Start with a comfortable level of tension and gradually increase it as your strength and form improve. It’s better to use a stronger band with a lower tension than to risk injury by overstretching a band that is too light for the exercise.

Basic exercises with resistance bands
Resistance bands can be used to target various muscle groups, providing a full-body workout. Here are five basic exercises to get you started:
Bicep curls
- Stand on the center of the resistance band, feet hip-width apart.
- Hold the ends of the band with your palms facing forward, arms fully extended.
- Keeping your elbows close to your sides, slowly curl your hands towards your shoulders, contracting your biceps.
- Pause for a moment at the top, then slowly lower back to the starting position.
- Repeat for the desired number of repetitions.
Squats
- Stand on the resistance band with your feet slightly wider than shoulder-width apart.
- Hold the ends of the band at shoulder level, with your palms facing inward.
- Lower your body into a squat position by bending at the knees and hips, pushing your hips back as if sitting into an imaginary chair.
- Keep your chest lifted, back straight, and knees in line with your toes.
- Push through your heels to return to the starting position.
- Repeat for the desired number of repetitions.
Shoulder presses
- Stand with one foot in the center of the resistance band, feet hip-width apart.
- Hold the ends of the band at shoulder level, palms facing forward, elbows bent and pointing out to the sides.
- Push the bands upward, extending your arms fully overhead.
- Pause at the top, then slowly lower the bands back to the starting position.
- Repeat for the desired number of repetitions.
Lateral band walks
- Place the resistance band around both ankles.
- Stand with feet hip-width apart and knees slightly bent.
- Keep your back straight and core engaged.
- Take small lateral steps to the right, pushing against the resistance of the band.
- Step outward with your left foot to return to the starting position.
- Repeat the movement to the left for the desired number of repetitions.
Standing rows
- Secure the resistance band around a sturdy object at waist height.
- Stand facing the anchor point, holding the ends of the band with your arms extended in front of you.
- Pull your elbows back, squeezing your shoulder blades together as you bring your hands towards your waist.
- Pause for a moment, then slowly extend your arms back to the starting position.
- Repeat for the desired number of repetitions.
Performing these basic exercises regularly will help you build a foundation of strength and familiarize yourself with the feel and resistance of the bands. As you become more comfortable, you can progress to more challenging exercises.
Progressive exercises with resistance bands
Once you’ve mastered the basic exercises, you can incorporate more advanced movements into your resistance band workouts. Here are five progressive exercises to take your training to the next level:
Chest presses
- Anchor the resistance band to a sturdy object at chest height.
- Stand facing away from the anchor point, holding the ends of the band at shoulder height with your palms facing forward.
- Step forward to create tension in the band.
- Press the bands forward, extending your arms fully in front of you.
- Slowly return to the starting position while maintaining tension in the bands.
- Repeat for the desired number of repetitions.
Tricep extensions
- Anchor the resistance band overhead.
- Stand with your feet shoulder-width apart and hold the ends of the band with your palms facing up.
- Extend your arms overhead, keeping your elbows close to your ears.
- Slowly bend your elbows, lowering your hands behind your head.
- Extend your arms back up, fully straightening your elbows.
- Repeat for the desired number of repetitions.
Deadlifts
- Stand on the center of the resistance band with your feet hip-width apart.
- Hold the ends of the band with an overhand grip, keeping your palms facing towards your body.
- Hinge at your hips, lowering your torso while keeping your back straight and knees slightly bent.
- Maintain tension in the band as you lower, and then squeeze your glutes to return to a standing position.
- Repeat for the desired number of repetitions.
Glute bridges
- Lie on your back with your knees bent and feet flat on the ground.
- Place the resistance band across your hips, just below your waistline.
- Hold the ends of the band firmly on each side, keeping your arms by your sides.
- Press your hips up towards the ceiling, squeezing your glutes.
- Pause for a moment at the top, then slowly lower your hips back to the ground.
- Repeat for the desired number of repetitions.
Leg press
- Secure the resistance band around a secure object at ankle height.
- Lie on your back with your feet hooked into the band and knees bent.
- Extend your legs straight, pressing against the resistance of the band.
- Slowly bend your knees, returning to the starting position.
- Repeat for the desired number of repetitions.
Progressive exercises challenge your muscles and help you continue building strength. As you become more comfortable with these movements, feel free to increase the resistance or adjust your positioning to increase the difficulty.

Incorporating resistance bands into a full-body workout routine
To maximize the benefits of resistance band workouts, it’s important to include exercises that target different muscle groups. Here are some suggestions for incorporating resistance bands into a full-body workout routine:
Upper body exercises
- Chest presses
- Shoulder presses
- Bicep curls
- Tricep extensions
- Standing rows
Lower body exercises
- Squats
- Deadlifts
- Lateral band walks
- Glute bridges
- Leg press
Core exercises
- Russian twists: Sit on the ground with your legs extended and the resistance band wrapped around your feet. Hold the band with your hands in front of your chest. Lean back slightly and twist your torso from side to side, engaging your core.
- Plank with lateral leg lifts: Assume a plank position with the resistance band around your ankles. Alternate lifting one leg out to the side, engaging your glutes and outer thighs.
- Standing oblique crunches: Stand on the resistance band with one foot and hold the band with both hands. Extend one arm overhead and lean to the side, engaging your obliques. Repeat on the other side.
Sample full-body workout routine
- Warm-up: 5-10 minutes of dynamic stretches and light cardio.
- Upper body exercises: Complete 3 sets of 10-12 repetitions for each exercise.
- Lower body exercises: Complete 3 sets of 10-12 repetitions for each exercise.
- Core exercises: Perform 2-3 sets of 12-15 repetitions for each exercise.
- Cool-down: 5-10 minutes of static stretching.
Remember to listen to your body and modify the exercises or resistance level as needed. Gradually increase the intensity or resistance over time to continue challenging your muscles.
Tips for maximizing the effectiveness of resistance band workouts
To make the most of your resistance band workouts, consider the following tips:
Proper breathing technique
Focus on your breathing while performing exercises with resistance bands. Inhale during the eccentric (lowering) phase and exhale during the concentric (lifting) phase. This helps stabilize your core, maintain proper form, and maximize muscle engagement.
Maintaining tension throughout the movement
Throughout each exercise, make a conscious effort to keep tension on the resistance band. Be mindful not to let the band go slack or lose resistance between repetitions. This continual tension helps to fully activate and develop the targeted muscle groups.
Using various resistance levels
Don’t be afraid to challenge yourself with different resistance levels. As you become stronger, gradually increase the resistance of the band to continue making progress and avoid plateauing. Experimenting with different resistance bands can help you target specific muscle groups more effectively.
Adding resistance bands to existing exercises
Resistance bands can be incorporated into existing exercises to increase the level of difficulty. For example, you can add a resistance band to traditional squats by placing it just above your knees, forcing your glutes and abductors to work harder. Look for opportunities to incorporate resistance bands into your favorite exercises to add variety and maximize the benefits.

Common mistakes to avoid
While resistance bands are a great tool for enhancing your workouts, be mindful of these common mistakes:
Using incorrect form
Maintaining proper form is crucial when using resistance bands. Avoid hunching your shoulders, arching your back, or using momentum to complete the exercises. Focus on engaging the target muscles and performing the movements with control and precision.
Overusing resistance bands
While resistance bands can be convenient and effective, it’s important not to solely rely on them for all of your workouts. Include a variety of exercises and equipment in your routine to target different muscle groups and prevent overuse injuries. Mix in other forms of resistance training, such as bodyweight exercises or free weights, to create a well-rounded fitness program.
Ignoring rest days
Rest and recovery are essential parts of any exercise routine. Give your body time to repair and rebuild by scheduling regular rest days. Overtraining can lead to muscle fatigue, decreased performance, and increased risk of injury. Find a balance between challenging yourself and allowing your body time to rest.
Not progressing in resistance
To continue making progress and avoid hitting a plateau, it’s important to gradually increase the resistance of the bands over time. As your muscles adapt to a certain level of resistance, they become more efficient, and further gains may be limited. Gradually increase the tension or resistance by using a stronger band or shortening the length of the band to stimulate further muscle growth and strength development.
Alternative uses for resistance bands
While resistance bands are commonly used for strength training, they can also serve other purposes:
Mobility and stretching exercises
Resistance bands can be valuable tools for improving flexibility and mobility. Incorporating band-assisted stretches and mobility exercises can help increase range of motion, reduce muscle tightness, and improve overall joint health.
Rehabilitation and injury prevention
Resistance bands are often utilized in physical therapy and rehabilitation settings to aid in recovering from injuries or surgery. They offer a controlled form of exercise that can help strengthen weakened muscles, improve stability, and aid in the recovery process.
Pilates and yoga
Resistance bands can be incorporated into Pilates and yoga practices to add variety and challenge to traditional movements and poses. They can provide additional resistance or support to help improve strength, balance, and body awareness.
Travel-friendly workouts
Resistance bands are an excellent option for staying active while traveling. They take up minimal space in your luggage and can be used to recreate a full-body workout in a hotel room or any other confined space. Whether you’re on vacation or a business trip, resistance bands allow you to maintain your fitness routine and stay active on the go.
Maintenance and care of resistance bands
To ensure the longevity and effectiveness of your resistance bands, proper maintenance and care are essential:
Cleaning resistance bands
Rubber resistance bands can be cleaned with mild soap and water. Gently wipe them down with a damp cloth or sponge, and allow them to air dry before storing. Fabric resistance bands can generally be machine washed on a gentle cycle and should be air-dried.
Storing resistance bands
Store your resistance bands in a cool, dry place away from direct sunlight, extreme temperatures, and sharp objects that could potentially damage them. Consider using a small storage bag or container to keep them organized and prevent tangling.
Replacing worn-out bands
Over time, resistance bands can lose their elasticity and effectiveness. Inspect your bands regularly for signs of wear and tear, such as cracking, fraying, or loss of tension. If your bands have become worn out or are no longer providing adequate resistance, it’s time to replace them with new ones.
Common troubleshooting
If you experience difficulty or discomfort while using resistance bands, consider these troubleshooting tips:
- Check your technique and form to ensure you are performing the exercises correctly.
- Adjust the resistance level by using a different band or altering the position of the band.
- Gradually increase the resistance or tension as your strength improves.
- If you have any pre-existing injuries or medical conditions, consult with a healthcare professional or fitness expert before using resistance bands.
Conclusion
Incorporating resistance bands into your workout routine can elevate your fitness journey and help you achieve your strength and fitness goals. Whether you’re a beginner or an advanced fitness enthusiast, resistance bands offer a convenient and effective way to strengthen muscles, improve flexibility, and enhance overall physical performance.
Remember to start with the basics and gradually progress to more challenging exercises as you build strength and confidence. Focus on maintaining proper form, engaging the targeted muscles, and gradually increasing the resistance to continue challenging yourself.
So, grab your resistance bands, follow the safety precautions, and start reaping the benefits of resistance band workouts. With patience, consistency, and proper technique, you’ll soon experience the positive changes in your strength, flexibility, and overall well-being. Happy banding!