
In this article, we will explore the top ways to meal prep for those following plant-based and vegan diets. Whether you’re a seasoned vegan or just starting out on your plant-based journey, meal prepping can be an incredibly helpful tool to ensure you have nutritious, delicious meals ready to go throughout the week. From planning your meals and shopping smartly to batch cooking and utilizing versatile ingredients, we’ll guide you through the steps to make your meal prepping experience a breeze. Get ready to discover the secrets to successful plant-based and vegan meal prepping!

Meal Planning
Meal planning is an essential component of maintaining a plant-based or vegan diet. By setting goals and determining your dietary requirements, you can ensure that your meals are not only delicious but also meet your nutritional needs. Start by assessing your specific goals, such as increasing your protein intake or reducing your consumption of processed foods. Once you have a clear understanding of what you want to achieve, it’s time to start researching plant-based and vegan recipes that align with your goals.
Research plant-based and vegan recipes
With the abundance of plant-based and vegan recipes available online and in cookbooks, it’s important to spend some time researching and finding recipes that appeal to you. Look for recipes that include a variety of fruits, vegetables, whole grains, legumes, nuts, and seeds, as these are the pillars of a well-rounded plant-based or vegan diet. Find recipes that are not only nutritious but also flavorful and satisfying. Experiment with different cooking techniques and flavors to keep your meals interesting and enjoyable.
Plan meals for the week
Once you have a collection of plant-based and vegan recipes that you’re excited to try, it’s time to plan your meals for the week. Take a look at your schedule and determine how many meals you need to prepare. Consider planning for breakfast, lunch, dinner, and snacks. Start by selecting a few recipes that you’ll enjoy for breakfast, such as overnight oats or tofu scrambles. Then, choose a variety of lunch and dinner recipes that incorporate different proteins, grains, and vegetables. Don’t forget about snacks too! Having a well-thought-out meal plan will make grocery shopping and meal preparation much easier and more efficient.
Make a grocery list
With your meal plan in hand, it’s time to make a grocery list. Go through each recipe and write down all the ingredients you’ll need. Check your pantry and fridge to see if you already have any of the ingredients on hand. Organize your list by sections such as fruits and vegetables, grains and legumes, and pantry staples. This will help you navigate the grocery store more efficiently and ensure you don’t forget any key ingredients. By making a grocery list and sticking to it, you’ll save time and money, and you’ll be more likely to stick to your plant-based or vegan meal plan.
Batch Cooking
Batch cooking is a game-changer when it comes to meal prep for plant-based and vegan diets. By cooking a large quantity of staple ingredients in advance, you can save time and ensure that you always have something delicious and nutritious on hand. Start by choosing recipes that are suitable for batch cooking. These are typically dishes that freeze well or can be stored in the fridge for a few days without losing their texture or flavor. Some great options include soups, stews, chili, curry, and casseroles.
Cook a large quantity of staple ingredients
Once you’ve selected your batch cooking recipes, it’s time to start cooking! Prepare a large quantity of staple ingredients like grains, legumes, and roasted vegetables. Cook a big pot of rice, quinoa, or oats, and store them in airtight containers in the fridge or freezer. Likewise, prepare a variety of legumes such as chickpeas, lentils, or black beans, and store them in separate containers. Having these pre-cooked and ready to go ingredients on hand will make meal prep a breeze.
Store prepared ingredients in the fridge or freezer
After cooking your staple ingredients, it’s important to store them properly to maintain their freshness and quality. Let the cooked grains and legumes cool completely before transferring them to airtight containers. For longer-term storage, freeze them in appropriate portion sizes so that you can easily thaw and use only what you need. Roasted vegetables can also be stored in the fridge or freezer, but be sure to let them cool completely before transferring them to containers.
Divide ingredients into individual portions
To make your batch-cooked ingredients even more convenient, consider dividing them into individual portions. This way, you’ll have pre-measured portions ready to use when it’s time to prepare a meal. Use reusable containers or freezer-safe bags to store individual portions of cooked grains, legumes, and roasted vegetables. Label each portion with the date it was cooked and the type of ingredient. By portioning your ingredients, you’ll save time and minimize food waste.
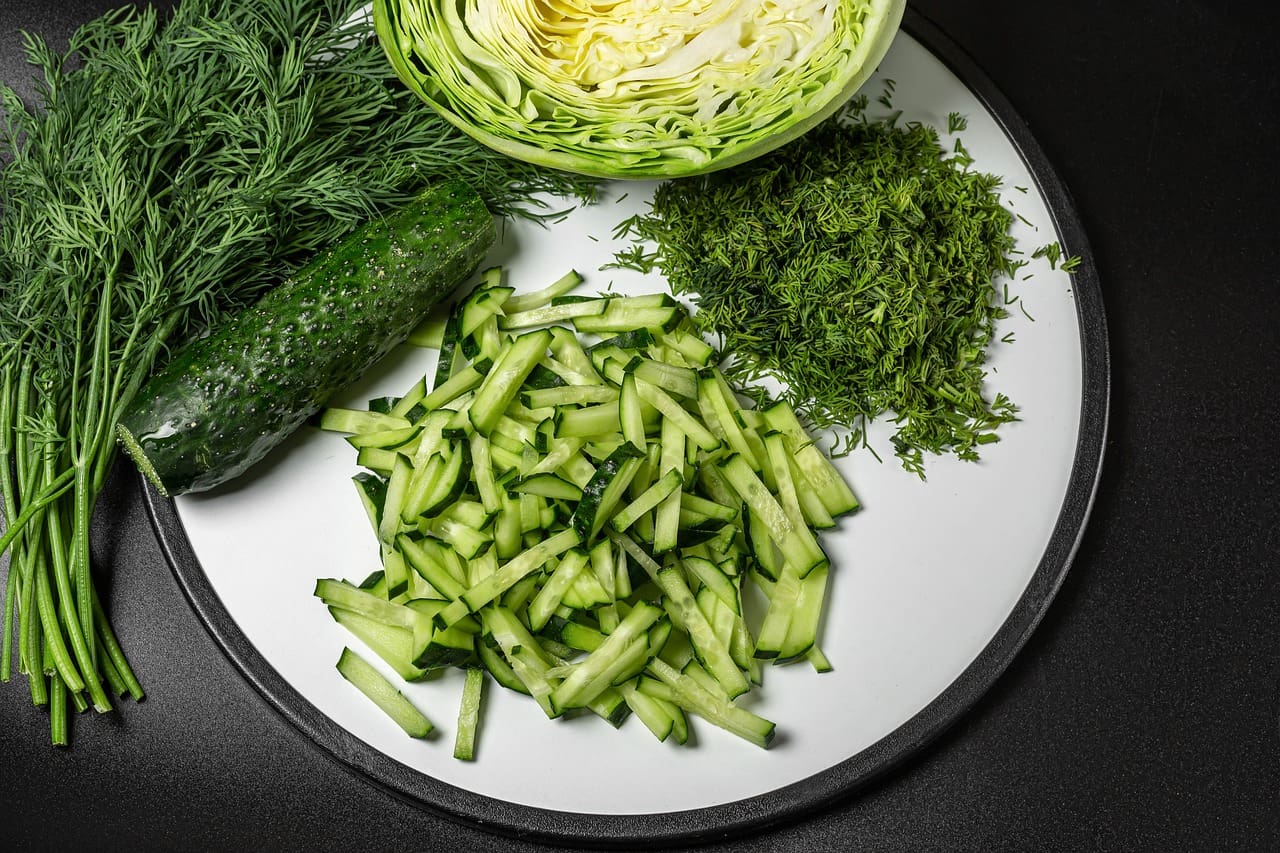
Pre-cut Vegetables and Fruits
Taking the time to wash and chop vegetables and fruits in advance can greatly speed up your meal preparation process. Choose a day of the week to dedicate to pre-cutting your produce and setting yourself up for success. Wash and chop a variety of vegetables such as bell peppers, carrots, celery, and cucumbers. Slice up fruits like berries, melons, and pineapple for easy snacking or adding to meals and desserts.
Store them in airtight containers or bags
After pre-cutting your vegetables and fruits, it’s important to store them properly to keep them fresh. Use airtight containers or bags to store your pre-cut produce. This will help prevent them from drying out or absorbing odors from other foods in the fridge. Be sure to label the containers with the contents and the date they were prepped to help you keep track of their freshness.
Use pre-cut produce in salads, stir-fries, or smoothies
Having pre-cut vegetables and fruits readily available makes it easy to incorporate them into your meals and snacks. Get creative with your meal planning and use your pre-cut produce in salads, stir-fries, or smoothies. Toss them into a salad for a quick and nutritious lunch or dinner. Add them to a stir-fry for a burst of color and flavor. Alternatively, blend them into smoothies for a refreshing and nutrient-packed treat.
Minimize food waste by portioning correctly
When pre-cutting your vegetables and fruits, it’s important to portion them correctly to minimize food waste. Only chop what you know you’ll consume within a few days, as some produce can lose their freshness and texture if stored for too long. If you find that you have excess pre-cut produce, consider freezing them for future use. This way, you’ll minimize food waste and always have a supply of pre-cut fruits and vegetables on hand.
Pre-cook Grains and Legumes
Similar to batch cooking, pre-cooking grains and legumes can streamline your meal prep process and save you valuable time. Cook a large batch of grains like rice, quinoa, or oats, and store them in the refrigerator or freezer. These pre-cooked grains can be easily reheated and incorporated into different meals throughout the week. Prepare a variety of legumes, such as chickpeas, lentils, or black beans, and store them in separate containers to have a variety of protein-rich options available.
Cook a large batch of grains like rice, quinoa, or oats
Start by cooking a large batch of your chosen grains. Whether you prefer rice, quinoa, or oats, cook a sufficient quantity to last you for several meals. Follow the cooking instructions on the package or experiment with different cooking methods to find what works best for you. Once cooked, let the grains cool before transferring them to airtight containers for storage.
Prepare a variety of legumes such as chickpeas, lentils, or black beans
Next, prep a variety of legumes to add protein and fiber to your meals. Chickpeas, lentils, and black beans are all excellent options that can be used in a wide range of recipes. Soak and cook the legumes according to the package instructions or use canned legumes if you prefer. Once cooked, drain and store them in separate containers for easy access.
Store cooked grains and legumes in the refrigerator or freezer
To ensure the freshness and longevity of your pre-cooked grains and legumes, it’s important to store them correctly. If you plan to use them within a few days, store them in airtight containers in the refrigerator. Alternatively, divide them into portion-sized containers or freezer bags and freeze them for later use. Just make sure to label each container with the date and type of grain or legume for easy identification.
Reheat and incorporate them into different meals
Having pre-cooked grains and legumes on hand allows you to easily incorporate them into various meals throughout the week. Reheat the grains and legumes from the refrigerator or thaw them if frozen, and use them as a base for Buddha bowls, grain salads, or as a side dish for your main meals. They can also be added to soups, stews, and stir-fries to boost the nutritional value and make the dishes more filling.
Make Homemade Sauces and Dressings
Elevate the flavors of your plant-based and vegan meals by making homemade sauces and dressings in advance. Experiment with different recipes and flavors to find your favorites. Whether you prefer a creamy tahini dressing, a tangy vinaigrette, or a vibrant pesto, making your own sauces and dressings allows you to control the ingredients and customize them to your taste preferences.
Experiment with different plant-based sauce and dressing recipes
Don’t be afraid to get creative in the kitchen and experiment with different plant-based sauce and dressing recipes. Look for inspiration online, in cookbooks, or even try adapting family recipes to fit your dietary needs. Consider using ingredients like avocado, tofu, nuts, seeds, and herbs to create creamy, flavorful sauces and dressings.
Prepare a few favorites in advance
Once you’ve found a few sauce and dressing recipes that you enjoy, spend some time preparing them in advance. Whip up a batch of your favorites and store them in jars or bottles in the fridge. This way, you’ll always have a variety of delicious and healthy options to add to your prepped ingredients.
Store them in jars or bottles in the fridge
To keep your homemade sauces and dressings fresh and easily accessible, store them in jars or bottles in the refrigerator. Make sure the containers are clean and airtight to maintain the flavors and prevent spoilage. Label each container with the type of sauce or dressing and the date it was made to help you keep track of their freshness.
Enjoy flavorful and healthy meals by adding these sauces and dressings to your prepped ingredients
By having a selection of homemade sauces and dressings on hand, you’ll be able to effortlessly enhance the flavors of your prepped ingredients. Drizzle a zesty vinaigrette over a grain and vegetable bowl, toss roasted vegetables in a creamy tahini dressing, or add a dollop of pesto to your pasta dishes. These flavorful additions will not only make your meals tastier but also provide additional nutrients and variety to your plant-based or vegan diet.
Pre-portion Snacks
To ensure you have convenient and healthy snacks readily available, pre-portion them in advance. Snacks like trail mix, energy balls, or fresh fruit cups can be prepared ahead of time and divided into individual portions. This way, you can grab a satisfying snack on the go or when hunger strikes.
Prepare snacks like trail mix, energy balls, or fresh fruit cups
Get creative with your snack prepping and prepare a variety of options that cater to your taste preferences. Make your own trail mix using your favorite nuts, dried fruits, and seeds. Whip up a batch of energy balls using dates, nut butter, and oats. Or simply chop up fresh fruits and store them in individual cups for an easy, grab-and-go snack.
Divide them into individual portions
After preparing your snacks, divide them into individual portions to make them more convenient to grab and enjoy. Use reusable containers or bags to store your pre-portioned snacks, making sure to label them if necessary. Having snacks ready to go will help you resist unhealthy temptations and ensure that you’re fueling your body with nutritious options throughout the day.
Store snacks in reusable containers or bags
To reduce waste and promote sustainability, store your pre-portioned snacks in reusable containers or bags. Invest in well-sealed, sturdy containers that can withstand travel and be easily cleaned. Alternatively, opt for reusable silicone bags or beeswax wraps to store your snacks. Not only will this reduce single-use plastic waste, but it will also keep your snacks fresh and prevent them from getting crushed.
Have convenient and healthy snacks readily available
By pre-portioning your snacks, you’ll have convenient and healthy options readily available whenever hunger strikes. Keep them in your bag, desk drawer, or pantry for easy access. Having satisfying snacks on hand will help you stay on track with your plant-based or vegan diet and prevent you from reaching for unhealthy alternatives when cravings hit.
Freeze Smoothie Packs
Smoothies are a great way to pack in a variety of nutrients and start your day on a refreshing note. To make your smoothie prep even more efficient, consider freezing smoothie packs in advance. This will save you time in the morning and ensure that you always have the ingredients you need for a quick and nutritious smoothie.
Prep smoothie ingredients such as fruits, vegetables, and add-ins
When prepping smoothie packs, start by prepping the ingredients you want to include. Chop up fruits like bananas, berries, and mangoes, and place them in individual freezer bags or containers. Similarly, wash and slice vegetables like spinach, kale, and cucumber, and have them ready to go. Don’t forget to include any add-ins like nuts, seeds, or protein powder for an extra nutritional boost.
Divide them into individual portions in freezer bags
Once you’ve prepped your smoothie ingredients, divide them into individual portions in freezer bags. This way, you can easily grab a bag from the freezer when you’re ready to make a smoothie. Be sure to label each bag with the ingredients and the recipe you plan to use it for. This will help you stay organized and ensure you’re using the right ingredients for your desired flavor combination.
Label the bags with the smoothie recipe
To make your smoothie prep even more convenient, label each freezer bag with the specific smoothie recipe it corresponds to. This way, you won’t have to guess what ingredients to add or waste time figuring out the ratios. Having the smoothie recipe right on the bag will streamline your morning routine and make it easier to incorporate nutritious smoothies into your busy schedule.
Simply blend the frozen ingredients with liquid for a quick and nutritious smoothie
When you’re ready to enjoy a smoothie, simply grab a prepped freezer bag, add your liquid of choice (such as plant-based milk or water), and blend until smooth. The frozen ingredients will help create a thick and refreshing smoothie with all the nutrients and flavors you desire. Whether you’re in a rush in the morning or need a quick pick-me-up during the day, these prepped smoothie packs will become your go-to solution.
Utilize a Slow Cooker or Instant Pot
Cooking on a plant-based or vegan diet doesn’t have to be time-consuming. By utilizing a slow cooker or Instant Pot, you can easily prepare delicious and nutritious meals with minimal effort. These kitchen appliances allow you to set it and forget it, so you can go about your day while your meals cook to perfection.
Find plant-based and vegan recipes suitable for slow cookers or Instant Pots
Start by finding plant-based and vegan recipes that are suitable for slow cookers or Instant Pots. Many traditional recipes can be easily adapted to fit these cooking methods. Look for recipes that feature beans, lentils, tofu, or vegetables as the main ingredients. These ingredients tend to respond well to slow cooking or pressure cooking and result in tender and flavorful meals.
Prep ingredients in the morning or the night before
To make the most of your slow cooker or Instant Pot, prep your ingredients in the morning or the night before. Chop vegetables, measure out spices, and gather any other ingredients needed for your recipe. This way, when it’s time to start cooking, you can simply add everything to the pot and let the appliance do the work.
Set the slow cooker or Instant Pot to cook while you’re away
One of the greatest advantages of using a slow cooker or Instant Pot is the ability to cook meals while you’re away. Set the timer and temperature according to your recipe’s instructions, and let the appliance work its magic. Whether you’re at work, running errands, or enjoying some downtime, you can trust that your meal will be slowly cooked or quickly pressure-cooked to perfection.
Come home to a delicious and ready-to-eat meal
After a long day, there’s nothing better than coming home to a delicious and ready-to-eat meal. With a slow cooker or Instant Pot, you can enjoy the convenience and satisfaction of having a warm and nourishing meal waiting for you. Simply dish up your meal, savor the flavors, and relax knowing that you’ve successfully prepped a delicious plant-based or vegan meal without any stress or hassle.
Prep Salad Jars
If you’re a fan of salads but find yourself pressed for time during the week, prep salad jars in advance for a quick and convenient meal. By layering your salad ingredients in glass jars, you can ensure that your salads stay fresh and crisp until you’re ready to enjoy them.
Layer salad ingredients in glass jars
To prep salad jars, start by layering your salad ingredients in glass jars. Begin with the dressing at the bottom to prevent the other ingredients from wilting. Add sturdy ingredients like chopped vegetables, grains, and legumes next. Finish off with delicate greens like spinach or lettuce. By layering your ingredients in this order, you create a barrier between the dressing and the greens, keeping them fresh and crisp.
Start with dressing at the bottom, followed by sturdy ingredients like vegetables and grains, and end with delicate greens
When layering your salad ingredients, it’s important to follow a specific order. Start with the dressing at the bottom of the jar. This prevents the other ingredients from becoming soggy or wilted. Next, layer in your sturdy ingredients like chopped vegetables, cooked grains, or legumes. These will serve as a barrier between the dressing and the delicate greens. Finally, top the jar with your choice of delicate greens, ensuring that they’re packed tightly to minimize contact with the dressing.
Store salad jars in the fridge
Once you’ve prepared your salad jars, store them in the fridge until you’re ready to enjoy them. Make sure to choose airtight lids or seals to keep the ingredients fresh and prevent any leakage. The layered structure of the jars will keep the ingredients separate and maintain their integrity until you’re ready to mix and eat the salad.
Enjoy fresh and convenient salads throughout the week
Having prepped salad jars in your fridge will make it incredibly easy to enjoy fresh and convenient salads throughout the week. Simply grab a jar when you’re on the go or need a quick meal, give it a good shake to mix the ingredients and distribute the dressing, and voila! You have a delicious and healthy salad ready to be enjoyed anywhere, anytime.
Label and Date Containers
To stay organized and prevent food waste, it’s important to label and date your prepped containers. By clearly identifying the contents and the date they were prepped, you can easily keep track of your meals and ingredients.
Use labels to clearly identify and date your prepped containers
Invest in labels or use a marker to clearly identify and date your prepped containers. This will prevent confusion and ensure that you’re using the ingredients in a timely manner. Make sure to label both the lids and sides of the containers for easy visibility.
Prevent confusion and prevent food waste by knowing when the ingredient expires
Keeping track of when your prepped ingredients expire is crucial in preventing food waste. By labeling and dating your containers, you’ll be able to quickly identify which ingredients need to be used first. This way, you can enjoy your meals while ensuring that no ingredients go to waste.
Maintain a rotating system for meals in the fridge and freezer
To ensure that you’re using your prepped meals and ingredients in a timely manner, maintain a rotating system in your fridge and freezer. Place new containers at the back and move older containers to the front. This way, you’ll always reach for the oldest items first, reducing the likelihood of anything going bad or being forgotten.
Keep track of your prepped meals and ingredients
Lastly, keep track of your prepped meals and ingredients. This can be done through a written list, a meal planning app, or simply by visually assessing your fridge and freezer. By knowing what you have on hand, you can plan your meals accordingly and prevent any waste. Regularly update your list or app and declutter your fridge and freezer to ensure a well-organized and efficient meal prep system.
In conclusion, meal prepping for a plant-based or vegan diet is an excellent strategy for staying on track with your nutritional goals, saving time, and minimizing food waste. By setting goals, researching recipes, meal planning, and making a grocery list, you’ll be well-prepared for a week of healthy eating. Batch cooking staple ingredients, pre-cutting vegetables and fruits, and pre-cooking grains and legumes will streamline your meal prep process and save you valuable time. Making homemade sauces and dressings, pre-portioning snacks, freezing smoothie packs, utilizing a slow cooker or Instant Pot, and prepping salad jars will all contribute to the convenience and efficiency of your plant-based or vegan meal prep. Lastly, don’t forget to label and date your prepped containers to stay organized and prevent food waste. With these top ways to meal prep for plant-based and vegan diets, you’ll be able to enjoy flavorful, nutritious, and convenient meals all week long.